<?xml version="1.0" encoding="utf-8"?><feed xmlns="http://www.w3.org/2005/Atom" ><generator uri="https://jekyllrb.com/" version="4.4.1">Jekyll</generator><link href="https://gouline.net/feed.xml" rel="self" type="application/atom+xml" /><link href="https://gouline.net/" rel="alternate" type="text/html" /><updated>2026-04-09T10:38:46+00:00</updated><id>https://gouline.net/feed.xml</id><title type="html">Mike Gouline</title><author><name>Mike Gouline</name></author><entry><title type="html">Django in Dev Containers</title><link href="https://gouline.net/2024/09/21/django-in-dev-containers.html" rel="alternate" type="text/html" title="Django in Dev Containers" /><published>2024-09-21T00:00:00+00:00</published><updated>2026-04-09T10:38:20+00:00</updated><id>https://gouline.net/2024/09/21/django-in-dev-containers</id><content type="html" xml:base="https://gouline.net/2024/09/21/django-in-dev-containers.html"><![CDATA[<p>Applications that depend on databases and other services make for fiddly local setup and Docker Compose is a common solution, but what about IDE integration? This article shows how you can develop Django applications entirely within a container using VS Code and <a href="https://code.visualstudio.com/docs/devcontainers/containers">Dev Containers</a>.</p>

<blockquote>
  <p>Just want to see the code? Help yourself to <a href="https://github.com/gouline/django-devcontainer">GitHub</a>.</p>
</blockquote>

<p><img src="https://gouline.net/img/posts/FK68LagZuXcf1YPxwzrBrQ.webp" alt="Open in container" /></p>

<h2 id="docker">Docker</h2>

<p>Before configuring VS Code, we need a working Docker Compose stack. While Docker alone is sufficient, a multiple-container setup is a more compelling proposition to demonstrate. Skip ahead if you already have your own <strong>Dockerfile</strong> and <strong>docker-compose.yaml</strong>.</p>

<blockquote>
  <p>Django specifics are out of scope, I will assume you have an existing application or you can use my example on GitHub (inspired by the <a href="https://docs.djangoproject.com/en/5.1/intro/tutorial01/">polls tutorial</a>).</p>
</blockquote>

<h3 id="dockerfile">Dockerfile</h3>

<p>Let’s start with a simple Debian-based Python image and inline pip.</p>

<div class="language-dockerfile highlighter-rouge"><div class="highlight"><pre class="highlight"><code><span class="k">FROM</span><span class="s"> python:3.12</span>
<span class="k">WORKDIR</span><span class="s"> /app</span>
<span class="k">RUN </span>pip <span class="nb">install </span>django psycopg
<span class="k">COPY</span><span class="s"> . ./</span>
<span class="k">ENTRYPOINT</span><span class="s"> ["python3", "manage.py"]</span>
</code></pre></div></div>

<p>Feel free to make this fancier while keeping in mind that non-Debian images may require some tweaking.</p>

<h3 id="docker-composeyaml">docker-compose.yaml</h3>

<p>We can add PostgreSQL with a health check, Django migration, and — most importantly — the <strong>app</strong> service that runs our Django server and VS Code will connect to. Repository root is mounted to <code class="language-plaintext highlighter-rouge">/app</code> in the container.</p>

<div class="language-yaml highlighter-rouge"><div class="highlight"><pre class="highlight"><code><span class="na">name</span><span class="pi">:</span> <span class="s">django-devcontainer</span>
<span class="na">services</span><span class="pi">:</span>
  <span class="na">postgres</span><span class="pi">:</span>
    <span class="na">image</span><span class="pi">:</span> <span class="s">postgres:16</span>
    <span class="na">ports</span><span class="pi">:</span>
      <span class="pi">-</span> <span class="s">5432:5432</span>
    <span class="na">env_file</span><span class="pi">:</span>
      <span class="pi">-</span> <span class="s">docker.env</span>
    <span class="na">healthcheck</span><span class="pi">:</span>
      <span class="na">test</span><span class="pi">:</span> <span class="pi">[</span><span class="s2">"</span><span class="s">CMD-SHELL"</span><span class="pi">,</span> <span class="s2">"</span><span class="s">pg_isready</span><span class="nv"> </span><span class="s">-U</span><span class="nv"> </span><span class="s">$$POSTGRES_USER"</span><span class="pi">]</span>
      <span class="na">interval</span><span class="pi">:</span> <span class="s">5s</span>
      <span class="na">timeout</span><span class="pi">:</span> <span class="s">5s</span>
      <span class="na">retries</span><span class="pi">:</span> <span class="m">5</span>
      <span class="na">start_period</span><span class="pi">:</span> <span class="s">10s</span>
    <span class="na">restart</span><span class="pi">:</span> <span class="s">always</span>
  <span class="na">migration</span><span class="pi">:</span>
    <span class="na">build</span><span class="pi">:</span> <span class="s">.</span>
    <span class="na">command</span><span class="pi">:</span> <span class="s">migrate</span>
    <span class="na">env_file</span><span class="pi">:</span>
      <span class="pi">-</span> <span class="s">docker.env</span>
    <span class="na">depends_on</span><span class="pi">:</span>
      <span class="na">postgres</span><span class="pi">:</span>
        <span class="na">condition</span><span class="pi">:</span> <span class="s">service_healthy</span>
  <span class="na">app</span><span class="pi">:</span>
    <span class="na">build</span><span class="pi">:</span> <span class="s">.</span>
    <span class="na">command</span><span class="pi">:</span> <span class="s">runserver 0.0.0.0:8080</span>
    <span class="na">ports</span><span class="pi">:</span>
      <span class="pi">-</span> <span class="s">8080:8080</span>
    <span class="na">env_file</span><span class="pi">:</span>
      <span class="pi">-</span> <span class="s">docker.env</span>
    <span class="na">volumes</span><span class="pi">:</span>
      <span class="pi">-</span> <span class="s">.:/app</span>
    <span class="na">depends_on</span><span class="pi">:</span>
      <span class="na">postgres</span><span class="pi">:</span>
        <span class="na">condition</span><span class="pi">:</span> <span class="s">service_healthy</span>
      <span class="na">migration</span><span class="pi">:</span>
        <span class="na">condition</span><span class="pi">:</span> <span class="s">service_completed_successfully</span>
</code></pre></div></div>

<p>You can validate everything works by running <code class="language-plaintext highlighter-rouge">docker compose up</code>.</p>

<h2 id="dev-containers">Dev Containers</h2>

<p>We can start configuring VS Code to connect to our Docker Compose stack:</p>

<ol>
  <li>Ensure <a href="https://marketplace.visualstudio.com/items?itemName=ms-vscode-remote.remote-containers">Dev Containers</a> extension is installed and enabled;</li>
  <li>Create an empty <code class="language-plaintext highlighter-rouge">.devcontainer/devcontainer.json</code> file — subsequent sections will fill it with functionality incrementally, producing a working setup at each step (in true Agile™ fashion).</li>
</ol>

<h3 id="basics">Basics</h3>

<p>Here’s a minimum working <strong>devcontainer.json</strong> setup:</p>

<div class="language-json highlighter-rouge"><div class="highlight"><pre class="highlight"><code><span class="p">{</span><span class="w">
  </span><span class="err">//</span><span class="w"> </span><span class="err">Path</span><span class="w"> </span><span class="err">to</span><span class="w"> </span><span class="err">Docker</span><span class="w"> </span><span class="err">Compose</span><span class="w"> </span><span class="err">file(s)</span><span class="w">
  </span><span class="nl">"dockerComposeFile"</span><span class="p">:</span><span class="w"> </span><span class="s2">"../docker-compose.yaml"</span><span class="p">,</span><span class="w">
  </span><span class="err">//</span><span class="w"> </span><span class="err">Which</span><span class="w"> </span><span class="err">service</span><span class="w"> </span><span class="err">inside</span><span class="w"> </span><span class="err">dockerComposeFile</span><span class="w"> </span><span class="err">to</span><span class="w"> </span><span class="err">attach</span><span class="w"> </span><span class="err">to</span><span class="w">
  </span><span class="nl">"service"</span><span class="p">:</span><span class="w"> </span><span class="s2">"app"</span><span class="p">,</span><span class="w">
  </span><span class="err">//</span><span class="w"> </span><span class="err">Attach</span><span class="w"> </span><span class="err">directory</span><span class="w"> </span><span class="err">within</span><span class="w"> </span><span class="err">the</span><span class="w"> </span><span class="err">service</span><span class="w"> </span><span class="err">container</span><span class="w">
  </span><span class="nl">"workspaceFolder"</span><span class="p">:</span><span class="w"> </span><span class="s2">"/app"</span><span class="w">
</span><span class="p">}</span><span class="w">
</span></code></pre></div></div>

<p>
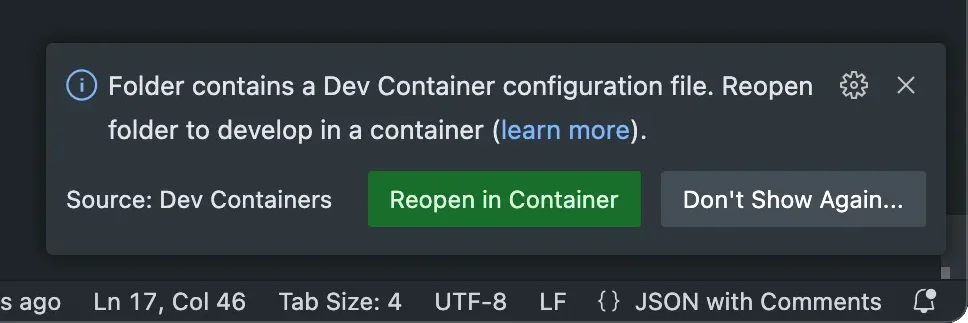
VS Code should prompt you to reopen your project in a container, otherwise you can search commands for <strong>Dev Containers: Reopen in Container</strong>. Once it builds and connects, your title bar should look like this:</p>

<p><img src="https://gouline.net/img/posts/PWsZsG-pDs1xEQyz_AAmbA.webp" alt="Running in container" /></p>

<p>
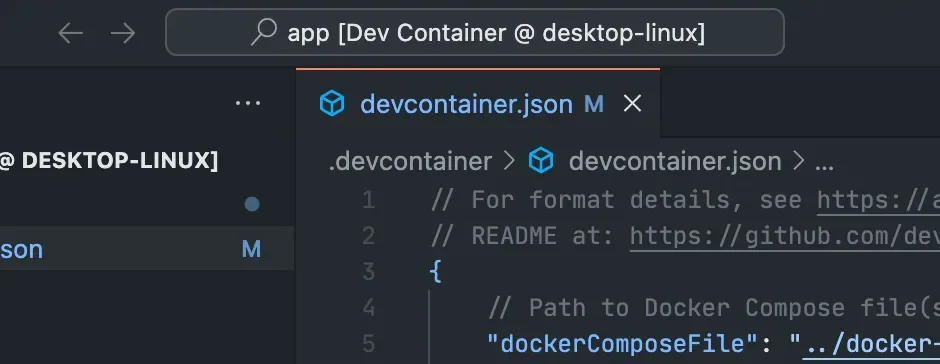
Congratulations, you are now developing inside the container!</p>

<h3 id="extensions">Extensions</h3>

<p>After the excitement wears off, you will realise there’s more work to do before this containerised environment is ready for Python development. Let’s install and configure your VS Code extensions:</p>

<div class="language-json highlighter-rouge"><div class="highlight"><pre class="highlight"><code><span class="p">{</span><span class="w">
  </span><span class="err">...</span><span class="w">
  </span><span class="err">//</span><span class="w"> </span><span class="err">VS</span><span class="w"> </span><span class="err">Code</span><span class="w"> </span><span class="err">customizations</span><span class="w">
  </span><span class="nl">"customizations"</span><span class="p">:</span><span class="w"> </span><span class="p">{</span><span class="w">
    </span><span class="nl">"vscode"</span><span class="p">:</span><span class="w"> </span><span class="p">{</span><span class="w">
      </span><span class="err">//</span><span class="w"> </span><span class="err">Extension</span><span class="w"> </span><span class="err">identifiers</span><span class="w"> </span><span class="err">to</span><span class="w"> </span><span class="err">install</span><span class="w">
      </span><span class="nl">"extensions"</span><span class="p">:</span><span class="w"> </span><span class="p">[</span><span class="w">
        </span><span class="s2">"ms-python.python"</span><span class="p">,</span><span class="w">
        </span><span class="s2">"ms-python.vscode-pylance"</span><span class="p">,</span><span class="w">
        </span><span class="s2">"ms-python.debugpy"</span><span class="p">,</span><span class="w">
        </span><span class="s2">"charliermarsh.ruff"</span><span class="p">,</span><span class="w">
        </span><span class="s2">"batisteo.vscode-django"</span><span class="w">
      </span><span class="p">]</span><span class="w">
    </span><span class="p">},</span><span class="w">
    </span><span class="err">//</span><span class="w"> </span><span class="err">Settings</span><span class="w"> </span><span class="err">from</span><span class="w"> </span><span class="err">your</span><span class="w"> </span><span class="err">workspace/project</span><span class="w"> </span><span class="err">settings.json</span><span class="w">
    </span><span class="nl">"settings"</span><span class="p">:</span><span class="w"> </span><span class="p">{</span><span class="w">
       </span><span class="err">//</span><span class="w"> </span><span class="err">Default</span><span class="w"> </span><span class="err">Python</span><span class="w"> </span><span class="err">interpreter</span><span class="w"> </span><span class="err">inside</span><span class="w"> </span><span class="err">the</span><span class="w"> </span><span class="err">container</span><span class="w">
       </span><span class="nl">"python.defaultInterpreterPath"</span><span class="p">:</span><span class="w"> </span><span class="s2">"/usr/local/bin/python3"</span><span class="p">,</span><span class="w">
       </span><span class="err">//</span><span class="w"> </span><span class="err">Django</span><span class="w"> </span><span class="err">manage.py</span><span class="w"> </span><span class="err">unit</span><span class="w"> </span><span class="err">testing</span><span class="w"> </span><span class="err">arguments</span><span class="w">
       </span><span class="nl">"python.testing.unittestArgs"</span><span class="p">:</span><span class="w"> </span><span class="p">[</span><span class="s2">"--no-input"</span><span class="p">],</span><span class="w">
       </span><span class="err">//</span><span class="w"> </span><span class="err">Enable</span><span class="w"> </span><span class="err">unittest-based</span><span class="w"> </span><span class="err">Python</span><span class="w"> </span><span class="err">tests</span><span class="w">
       </span><span class="nl">"python.testing.unittestEnabled"</span><span class="p">:</span><span class="w"> </span><span class="kc">true</span><span class="w">
    </span><span class="p">}</span><span class="w">
 </span><span class="p">}</span><span class="w">
</span></code></pre></div></div>

<p>These are my favourites, you can add others from the <a href="https://marketplace.visualstudio.com/vscode">Marketplace</a> by their identifiers (shown under “More Info”).</p>

<p>This minimal setup configures Python and unit testing, but you need to set <code class="language-plaintext highlighter-rouge">MANAGE_PY_PATH</code> environment variable to run <a href="https://code.visualstudio.com/docs/python/testing#_django-unit-tests">Django unit tests</a>:</p>

<div class="language-json highlighter-rouge"><div class="highlight"><pre class="highlight"><code><span class="p">{</span><span class="w">
  </span><span class="err">...</span><span class="w">
  </span><span class="err">//</span><span class="w"> </span><span class="err">Environment</span><span class="w"> </span><span class="err">variables</span><span class="w"> </span><span class="err">inside</span><span class="w"> </span><span class="err">the</span><span class="w"> </span><span class="err">container</span><span class="w">
  </span><span class="nl">"containerEnv"</span><span class="p">:</span><span class="w"> </span><span class="p">{</span><span class="w">
    </span><span class="nl">"MANAGE_PY_PATH"</span><span class="p">:</span><span class="w"> </span><span class="s2">"./manage.py"</span><span class="w">
  </span><span class="p">}</span><span class="w">
</span><span class="p">}</span><span class="w">
</span></code></pre></div></div>

<blockquote>
  <p>While you can alternatively set environment variables in <strong>Dockerfile</strong>, <strong>docker-compose.yaml</strong> or elsewhere, given this one is only used by VS Code, that’s where I prefer to keep it.</p>
</blockquote>

<p>After making these changes to <strong>devcontainer.json</strong>, you will be prompted to rebuild to apply them, otherwise you can search commands for <strong>Dev Containers: Rebuild Container</strong>. Once completed, your tests should now be runnable under <strong>Testing</strong> in the side bar:</p>

<p><img src="https://gouline.net/img/posts/rkgr8zYVMDV4Nt6w9qTtJg.webp" alt="Testing" /></p>

<h3 id="git">Git</h3>

<p>We can write and test code, now we need to commit it to Git. Add the following to your <strong>devcontainer.json</strong> to install <a href="https://github.com/devcontainers/features/pkgs/container/features%2Fgit">Git</a> and <a href="https://github.com/jungaretti/features/pkgs/container/features%2Fvim">Vim</a> (for editing commit messages):</p>

<div class="language-json highlighter-rouge"><div class="highlight"><pre class="highlight"><code><span class="p">{</span><span class="w">
  </span><span class="err">...</span><span class="w">
  </span><span class="nl">"features"</span><span class="p">:</span><span class="w"> </span><span class="p">{</span><span class="w">
    </span><span class="err">//</span><span class="w"> </span><span class="err">Install</span><span class="w"> </span><span class="err">git</span><span class="w"> </span><span class="err">for</span><span class="w"> </span><span class="err">your</span><span class="w"> </span><span class="err">dev</span><span class="w"> </span><span class="err">environment</span><span class="w">
    </span><span class="nl">"ghcr.io/devcontainers/features/git:1"</span><span class="p">:</span><span class="w"> </span><span class="p">{},</span><span class="w">
    </span><span class="err">//</span><span class="w"> </span><span class="err">Install</span><span class="w"> </span><span class="err">vim</span><span class="w"> </span><span class="err">for</span><span class="w"> </span><span class="err">git</span><span class="w"> </span><span class="err">commit</span><span class="w"> </span><span class="err">messages</span><span class="w">
    </span><span class="nl">"ghcr.io/jungaretti/features/vim:1"</span><span class="p">:</span><span class="w"> </span><span class="p">{}</span><span class="w">
  </span><span class="p">}</span><span class="w">
</span><span class="p">}</span><span class="w">
</span></code></pre></div></div>

<blockquote>
  <p>Once again, you can install packages directly in the container, this just gives you a nice abstraction for tools only used in VS Code.</p>
</blockquote>

<p>Other features are available <a href="https://containers.dev/features">here</a>, you can even contribute your own.</p>

<p>Your <strong>.gitconfig</strong> should already be passed through to the container, but SSH credentials need to be exposed manually:</p>

<div class="language-json highlighter-rouge"><div class="highlight"><pre class="highlight"><code><span class="p">{</span><span class="w">
  </span><span class="err">...</span><span class="w">
  </span><span class="nl">"mounts"</span><span class="p">:</span><span class="w"> </span><span class="p">[</span><span class="w">
    </span><span class="err">//</span><span class="w"> </span><span class="err">Expose</span><span class="w"> </span><span class="err">~/.ssh</span><span class="w"> </span><span class="err">to</span><span class="w"> </span><span class="err">the</span><span class="w"> </span><span class="err">container</span><span class="w"> </span><span class="err">(read</span><span class="w"> </span><span class="err">only)</span><span class="w">
    </span><span class="s2">"source=${localEnv:HOME}/.ssh,target=/root/.ssh,type=bind,ro,consistency=cached"</span><span class="w">
  </span><span class="p">]</span><span class="w">
</span><span class="p">}</span><span class="w">
</span></code></pre></div></div>

<p>See <a href="https://docs.docker.com/engine/storage/bind-mounts/">Docker documentation</a> for more information about mounts, if you want to share anything else on the host machine with your container.</p>

<h3 id="bash">Bash</h3>

<p>What if we want shell creature comforts, such as completions and custom prompts? There’s a feature for that too!</p>

<p>Let’s create <strong>.bashrc</strong> with your preferences in <code class="language-plaintext highlighter-rouge">~/.config/devcontainer</code>:</p>

<div class="language-bash highlighter-rouge"><div class="highlight"><pre class="highlight"><code><span class="c"># Bash completion for Git</span>
<span class="k">if</span> <span class="o">[</span> <span class="nt">-f</span> /usr/share/bash-completion/completions/git <span class="o">]</span><span class="p">;</span> <span class="k">then
    </span><span class="nb">source</span> /usr/share/bash-completion/completions/git
<span class="k">fi</span>
<span class="c"># Custom prompt with current Git branch</span>
<span class="k">if</span> <span class="o">[</span> <span class="nt">-f</span> /usr/lib/git-core/git-sh-prompt <span class="o">]</span><span class="p">;</span> <span class="k">then
    </span><span class="nb">source</span> /usr/lib/git-core/git-sh-prompt
    <span class="nv">PS1</span><span class="o">=</span><span class="s1">'\[\033[01;32m\]➜\[\033[0m\] \[\033[36m\]\W\[\033[0m\]\[\033[01;31m\]$(__git_ps1 " (%s)")\[\033[0m\] \$ '</span>
<span class="k">fi</span>
</code></pre></div></div>

<p>See <a href="https://git-scm.com/book/en/v2/Appendix-A%3A-Git-in-Other-Environments-Git-in-Bash">Git documentation</a> for more information on what’s happening here.</p>

<p>Now we need to add <a href="https://github.com/eliises/devcontainer-features/pkgs/container/devcontainer-features%2Fbash-profile">bash-profile</a> feature and a corresponding mount for that <code class="language-plaintext highlighter-rouge">~/.config/devcontainer</code> directory:</p>

<div class="language-json highlighter-rouge"><div class="highlight"><pre class="highlight"><code><span class="p">{</span><span class="w">
  </span><span class="err">...</span><span class="w">
  </span><span class="nl">"features"</span><span class="p">:</span><span class="w"> </span><span class="p">{</span><span class="w">
    </span><span class="err">...</span><span class="w">
    </span><span class="err">//</span><span class="w"> </span><span class="err">Source</span><span class="w"> </span><span class="err">.bashrc</span><span class="w"> </span><span class="err">under</span><span class="w"> </span><span class="err">~/.config/devcontainer</span><span class="w"> </span><span class="err">mount</span><span class="w"> </span><span class="err">(if</span><span class="w"> </span><span class="err">exists)</span><span class="w">
    </span><span class="nl">"ghcr.io/eliises/devcontainer-features/bash-profile:1"</span><span class="p">:</span><span class="w"> </span><span class="p">{</span><span class="w">
      </span><span class="nl">"command"</span><span class="p">:</span><span class="w"> </span><span class="s2">"test -f /devcontainer/.bashrc &amp;&amp; . /devcontainer/.bashrc"</span><span class="w">
    </span><span class="p">}</span><span class="w">
  </span><span class="p">}</span><span class="w">
  </span><span class="nl">"mounts"</span><span class="p">:</span><span class="w"> </span><span class="p">[</span><span class="w">
    </span><span class="err">...</span><span class="w">
    </span><span class="err">//</span><span class="w"> </span><span class="err">Other</span><span class="w"> </span><span class="err">optional</span><span class="w"> </span><span class="err">container</span><span class="w"> </span><span class="err">configurations</span><span class="w">
    </span><span class="s2">"source=${localEnv:HOME}/.config/devcontainer,target=/devcontainer,type=bind,ro,consistency=cached"</span><span class="w">
  </span><span class="p">]</span><span class="w">
</span><span class="p">}</span><span class="w">
</span></code></pre></div></div>

<p>
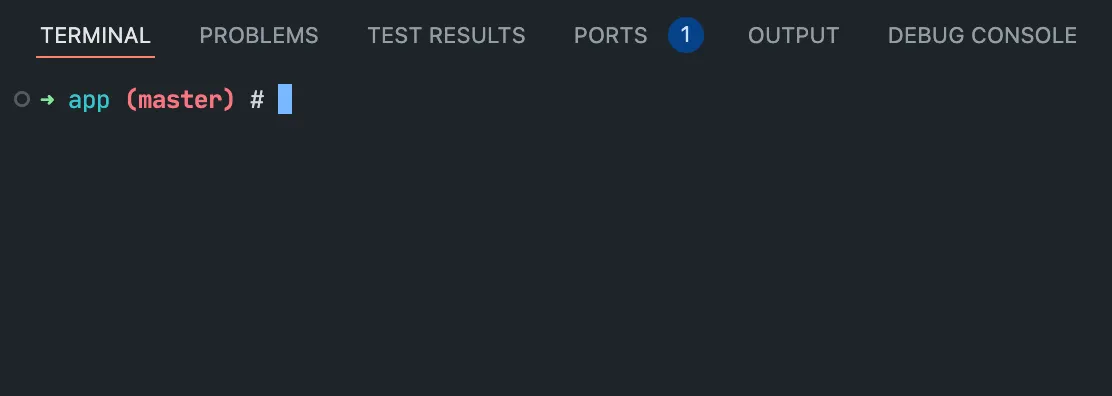
Your container’s terminal feels like home without forcing your aesthetic choices on your colleagues, since <strong>.bashrc</strong> lives outside the repository!</p>

<p><img src="https://gouline.net/img/posts/G2VyMvJk-iihglGa4kGZxw.webp" alt="Terminal prompt" /></p>

<h2 id="conclusion">Conclusion</h2>

<p>This guide walked you through a working setup for Django development in Dev Containers, see <a href="https://containers.dev/implementors/json_reference/">documentation</a> for more <strong>devcontainer.json</strong> options or simply use autocompletion and tooltips in VS Code. While some extensions were specific to Python, you can recycle everything else for containerised projects in other languages as well.</p>

<p>Hopefully, this saves you some <a href="https://en.wiktionary.org/wiki/yak_shaving">yak shaving</a> and improves your workflow!</p>]]></content><author><name>Mike Gouline</name></author><category term="python" /><category term="django" /><category term="vscode" /><category term="docker" /><summary type="html"><![CDATA[Applications that depend on databases and other services make for fiddly local setup and Docker Compose is a common solution, but what about IDE integration? This article shows how you can develop Django applications entirely within a container using VS Code and Dev Containers.]]></summary><media:thumbnail xmlns:media="http://search.yahoo.com/mrss/" url="https://gouline.net/img/posts/PWsZsG-pDs1xEQyz_AAmbA.webp" /><media:content medium="image" url="https://gouline.net/img/posts/PWsZsG-pDs1xEQyz_AAmbA.webp" xmlns:media="http://search.yahoo.com/mrss/" /></entry><entry><title type="html">From Machine Users to GitHub Apps</title><link href="https://gouline.net/2023/11/13/from-machine-users-to-github-apps.html" rel="alternate" type="text/html" title="From Machine Users to GitHub Apps" /><published>2023-11-13T00:00:00+00:00</published><updated>2026-04-09T10:38:20+00:00</updated><id>https://gouline.net/2023/11/13/from-machine-users-to-github-apps</id><content type="html" xml:base="https://gouline.net/2023/11/13/from-machine-users-to-github-apps.html"><![CDATA[<p>Whenever a shared machine, such as a build server, needs access to your GitHub organisation, we traditionally opted for personal access tokens (PATs) or SSH keys created against a machine user. This works until you consider the security implications of not being able to attribute actions made by that user to any of the humans with access to it.</p>

<p>GitHub Apps is a more secure alternative, where apps can be installed in your organisation — not only a user — and granted granular permissions to repositories, packages, issues, etc. Unfortunately, the setup is slightly more involved than for PATs and SSH keys, so I decided to write up my experience with it.</p>

<p><img src="https://gouline.net/img/posts/i0WPuZg9QTG9Y4p4.webp" alt="Octocat" />
<small>Photo by <a href="https://unsplash.com/@synkevych">Roman Synkevych</a> on <a href="https://unsplash.com/">Unsplash</a></small></p>

<h2 id="alternatives">Alternatives</h2>

<p>Before diving into GitHub Apps, I should mention that if your shared machine only requires access to a single repository, consider using <a href="https://docs.github.com/en/authentication/connecting-to-github-with-ssh/managing-deploy-keys">deploy keys</a> instead — they are SSH keys that you configure a repository, instead of a user or organisation. Note that while you can have many keys for one repository, you can only associate each key with one repository at a time. As a result, this is not a good solution for, say, a build server that needs to clone all repositories in your organisation.</p>

<p>If you are using a cloud service, also check that it does not already provide a GitHub App that you can install. With GitHub’s popularity, this covers many use cases.</p>

<h2 id="app-setup">App Setup</h2>

<p>Initial configuration involves registering a new generic GitHub App and then installing it in your specific organisation. This will happen entirely in the web interface.</p>

<h3 id="register-your-app">Register Your App</h3>

<p>Go to your user or organisation settings, expand the “Developer settings” (at the bottom of the sidebar) and click “GitHub Apps”.</p>

<p>Now click “New GitHub App” and fill in the following sections (more information can be found <a href="https://docs.github.com/en/apps/creating-github-apps/registering-a-github-app/registering-a-github-app">here</a>):</p>

<ul>
  <li><strong>GitHub App name</strong> — <em>globally-unique</em> name that describes your organisation and the purpose of this integration, e.g. “Acme CI”</li>
  <li><strong>Homepage URL</strong> — this app will remain private, so the homepage can be any valid URL, e.g. your company website</li>
  <li><strong>Webhook</strong> — uncheck “Active”, we will not use it</li>
  <li><strong>Permissions</strong> — configure <em>all</em> permissions that your shared machine needs, e.g. to clone repositories, you need at least “Read-only” access on “Contents” under “Repository permissions” (read more <a href="https://docs.github.com/en/apps/creating-github-apps/registering-a-github-app/choosing-permissions-for-a-github-app">here</a>)</li>
  <li><strong>Where can this GitHub App be installed?</strong> — if you are registering this app from a different user or organisation than where you will be installing it, select “Any account”</li>
</ul>

<p>Save your new app by clicking “Create GitHub App”.</p>

<h3 id="install-your-app">Install Your App</h3>

<p>Inside your newly-registered app, note down the “App ID” for later.
Scroll down to “Private keys” and click “Generate a private key”. New PEM file will start downloading — you must keep it safe, it will be used for authentication. If it does get lost or compromised, you can always delete it and generate a new one.
Finally, open “Install App” in the sidebar and click “Install” next to your organisation. This grants your new app the permissions on your specific organisation that you configured in the previous section.</p>

<h2 id="authentication">Authentication</h2>

<p>Now that your app is installed, let’s look at authenticating against it from your shared machine. I will describe a simple custom implementation, to help you understand all the steps involved, but there is an easier way at the end if the Git client is all you need.</p>

<h3 id="custom-implementation">Custom Implementation</h3>

<p>This sample is implemented in Python using <a href="https://pypi.org/project/requests/">jwt</a> and <a href="https://pypi.org/project/requests/">requests</a> packages, but any other alternatives would work just as well.</p>

<p>Note that I am omitting the retrieval of your organisation name, app ID and private key file, created in the previous section, because that is dependent on your environment. For example, you may want to use the secrets manager in your operating system or cloud provider.</p>

<p>We start by preparing your JSON web token (JWT) for authenticating against the GitHub API (you can read more <a href="https://docs.github.com/en/apps/creating-github-apps/authenticating-with-a-github-app/generating-a-json-web-token-jwt-for-a-github-app">here</a>).</p>

<div class="language-python highlighter-rouge"><div class="highlight"><pre class="highlight"><code><span class="kn">import</span> <span class="n">jwt</span>
<span class="kn">import</span> <span class="n">time</span>

<span class="k">def</span> <span class="nf">get_encoded_jwt</span><span class="p">(</span><span class="n">app_id</span><span class="p">,</span> <span class="n">private_key_path</span><span class="p">):</span>
    <span class="k">with</span> <span class="nf">open</span><span class="p">(</span><span class="n">private_key_path</span><span class="p">,</span> <span class="sh">"</span><span class="s">rb</span><span class="sh">"</span><span class="p">)</span> <span class="k">as</span> <span class="n">pem_file</span><span class="p">:</span>
        <span class="n">signing_key</span> <span class="o">=</span> <span class="n">jwt</span><span class="p">.</span><span class="nf">jwk_from_pem</span><span class="p">(</span><span class="n">pem_file</span><span class="p">.</span><span class="nf">read</span><span class="p">())</span>

    <span class="k">return</span> <span class="n">jwt</span><span class="p">.</span><span class="nc">JWT</span><span class="p">().</span><span class="nf">encode</span><span class="p">(</span>
        <span class="n">payload</span><span class="o">=</span><span class="p">{</span>
            <span class="sh">"</span><span class="s">iat</span><span class="sh">"</span><span class="p">:</span> <span class="nf">int</span><span class="p">(</span><span class="n">time</span><span class="p">.</span><span class="nf">time</span><span class="p">()),</span>
            <span class="sh">"</span><span class="s">exp</span><span class="sh">"</span><span class="p">:</span> <span class="nf">int</span><span class="p">(</span><span class="n">time</span><span class="p">.</span><span class="nf">time</span><span class="p">())</span> <span class="o">+</span> <span class="mi">10</span> <span class="o">*</span> <span class="mi">60</span><span class="p">,</span>  <span class="c1"># 10 mins (maximum)
</span>            <span class="sh">"</span><span class="s">iss</span><span class="sh">"</span><span class="p">:</span> <span class="n">app_id</span><span class="p">,</span>
        <span class="p">},</span>
        <span class="n">key</span><span class="o">=</span><span class="n">signing_key</span><span class="p">,</span>
        <span class="n">alg</span><span class="o">=</span><span class="sh">"</span><span class="s">RS256</span><span class="sh">"</span><span class="p">,</span>
    <span class="p">)</span>
</code></pre></div></div>

<p>First request retrieves the API URL to request a new access token for the installation in your organisation.</p>

<div class="language-python highlighter-rouge"><div class="highlight"><pre class="highlight"><code><span class="k">def</span> <span class="nf">get_access_token_url</span><span class="p">(</span><span class="n">encoded_jwt</span><span class="p">,</span> <span class="n">org</span><span class="p">):</span>
    <span class="n">resp</span> <span class="o">=</span> <span class="n">requests</span><span class="p">.</span><span class="nf">get</span><span class="p">(</span>
        <span class="n">url</span><span class="o">=</span><span class="sh">"</span><span class="s">https://api.github.com/app/installations</span><span class="sh">"</span><span class="p">,</span>
        <span class="n">headers</span><span class="o">=</span><span class="p">{</span>
            <span class="sh">"</span><span class="s">Accept</span><span class="sh">"</span><span class="p">:</span> <span class="sh">"</span><span class="s">application/vnd.github+json</span><span class="sh">"</span><span class="p">,</span>
            <span class="sh">"</span><span class="s">Authorization</span><span class="sh">"</span><span class="p">:</span> <span class="sa">f</span><span class="sh">"</span><span class="s">Bearer </span><span class="si">{</span><span class="n">encoded_jwt</span><span class="si">}</span><span class="sh">"</span><span class="p">,</span>
            <span class="sh">"</span><span class="s">X-GitHub-Api-Version</span><span class="sh">"</span><span class="p">:</span> <span class="sh">"</span><span class="s">2022-11-28</span><span class="sh">"</span><span class="p">,</span>
        <span class="p">},</span>
    <span class="p">)</span>
    <span class="k">for</span> <span class="n">installation</span> <span class="ow">in</span> <span class="n">resp</span><span class="p">.</span><span class="nf">json</span><span class="p">():</span>
        <span class="k">if</span> <span class="n">installation</span><span class="p">[</span><span class="sh">"</span><span class="s">account</span><span class="sh">"</span><span class="p">][</span><span class="sh">"</span><span class="s">login</span><span class="sh">"</span><span class="p">]</span> <span class="o">==</span> <span class="n">org</span><span class="p">:</span>
            <span class="k">return</span> <span class="n">installation</span><span class="p">.</span><span class="nf">get</span><span class="p">(</span><span class="sh">"</span><span class="s">access_tokens_url</span><span class="sh">"</span><span class="p">)</span>
    <span class="k">return</span> <span class="bp">None</span>
</code></pre></div></div>

<p>The URL will be of the form <code class="language-plaintext highlighter-rouge">https://github.com/app/installations/INSTALLATION_ID/access_tokens</code> and you can alternatively find that <code class="language-plaintext highlighter-rouge">INSTALLATION_ID</code> by clicking the ⚙ (cog) icon next to your organisation in the “Install App” section of your app, and checking the end of that URL, e.g. <code class="language-plaintext highlighter-rouge">.../installations/INSTALLATION_ID</code>.</p>

<p>Now we can use that URL to request a new installation access token (see <a href="https://docs.github.com/en/rest/apps/apps?apiVersion=2022-11-28#create-an-installation-access-token-for-an-app">endpoint</a> for details).</p>

<div class="language-python highlighter-rouge"><div class="highlight"><pre class="highlight"><code><span class="k">def</span> <span class="nf">get_access_token</span><span class="p">(</span><span class="n">encoded_jwt</span><span class="p">,</span> <span class="n">access_token_url</span><span class="p">):</span>
    <span class="n">resp</span> <span class="o">=</span> <span class="n">requests</span><span class="p">.</span><span class="nf">post</span><span class="p">(</span>
        <span class="n">url</span><span class="o">=</span><span class="n">access_tokens_url</span><span class="p">,</span>
        <span class="n">headers</span><span class="o">=</span><span class="p">{</span>
            <span class="sh">"</span><span class="s">Accept</span><span class="sh">"</span><span class="p">:</span> <span class="sh">"</span><span class="s">application/vnd.github+json</span><span class="sh">"</span><span class="p">,</span>
            <span class="sh">"</span><span class="s">Authorization</span><span class="sh">"</span><span class="p">:</span> <span class="sa">f</span><span class="sh">"</span><span class="s">Bearer </span><span class="si">{</span><span class="n">encoded_jwt</span><span class="si">}</span><span class="sh">"</span><span class="p">,</span>
            <span class="sh">"</span><span class="s">X-GitHub-Api-Version</span><span class="sh">"</span><span class="p">:</span> <span class="sh">"</span><span class="s">2022-11-28</span><span class="sh">"</span><span class="p">,</span>
        <span class="p">},</span>
    <span class="p">)</span>
    <span class="k">return</span> <span class="n">resp</span><span class="p">.</span><span class="nf">json</span><span class="p">().</span><span class="nf">get</span><span class="p">(</span><span class="sh">"</span><span class="s">token</span><span class="sh">"</span><span class="p">)</span>
</code></pre></div></div>

<p>That’s it! You can now authenticate with GitHub using this token. Note that it expires after an hour, so your implementation will need to periodically refresh it.
When authenticating using anything that takes a username and a password (e.g. Git client), the access token is the password and <code class="language-plaintext highlighter-rouge">x-access-token</code> is the username.</p>

<h3 id="git-client">Git Client</h3>

<p>For the native Git client, used either directly or through another tool that calls out to it, you can configure a <a href="https://git-scm.com/docs/gitcredentials#_custom_helpers">credential helper</a> instead.</p>

<p>In a nutshell, Git allows you to configure any executable called <code class="language-plaintext highlighter-rouge">git-credential-somename</code> in your PATH to dynamically fetch credentials according to any custom logic you like.</p>

<p>There are several available for GitHub Apps, I prefer this one written in Go — <a href="https://github.com/Avinode/git-credential-github-apps">https://github.com/Avinode/git-credential-github-apps</a>. All you have to do is extract your platform-appropriate <code class="language-plaintext highlighter-rouge">git-credential-github-apps</code> binary the releases, place it somewhere under your PATH (e.g. <code class="language-plaintext highlighter-rouge">/usr/local/bin</code>) and execute the following:</p>

<div class="language-shell highlighter-rouge"><div class="highlight"><pre class="highlight"><code>git config <span class="nt">--global</span> credential.helper <span class="s1">'github-apps -privatekey &lt;path to private key&gt; -appid &lt;App ID&gt; -login &lt;organization&gt;'</span>
</code></pre></div></div>

<p>Ensure that your user has a <code class="language-plaintext highlighter-rouge">~/.cache</code> directory — that’s where the helper stores cached credentials until they expire.</p>

<p>If your existing setup clones repositories via SSH and you want backwards compatibility, you can force HTTPS URL replacement:</p>

<div class="language-shell highlighter-rouge"><div class="highlight"><pre class="highlight"><code>git config <span class="nt">--global</span> url.<span class="s2">"https://github.com/"</span>.insteadOf <span class="s2">"git@github.com:"</span>
</code></pre></div></div>

<p>Your Git client can now clone repositories as normal. This should also work for CLI tools that execute Git commands implicitly, but your results may vary and I recommend some testing.</p>]]></content><author><name>Mike Gouline</name></author><category term="github" /><category term="python" /><summary type="html"><![CDATA[Whenever a shared machine, such as a build server, needs access to your GitHub organisation, we traditionally opted for personal access tokens (PATs) or SSH keys created against a machine user. This works until you consider the security implications of not being able to attribute actions made by that user to any of the humans with access to it.]]></summary><media:thumbnail xmlns:media="http://search.yahoo.com/mrss/" url="https://gouline.net/img/posts/i0WPuZg9QTG9Y4p4.webp" /><media:content medium="image" url="https://gouline.net/img/posts/i0WPuZg9QTG9Y4p4.webp" xmlns:media="http://search.yahoo.com/mrss/" /></entry><entry><title type="html">Scraping Internet Outages with Selenium and Python</title><link href="https://gouline.net/2021/06/01/scraping-internet-outages-with-selenium-and-python.html" rel="alternate" type="text/html" title="Scraping Internet Outages with Selenium and Python" /><published>2021-06-01T00:00:00+00:00</published><updated>2026-04-09T10:38:20+00:00</updated><id>https://gouline.net/2021/06/01/scraping-internet-outages-with-selenium-and-python</id><content type="html" xml:base="https://gouline.net/2021/06/01/scraping-internet-outages-with-selenium-and-python.html"><![CDATA[<p>Imagine you have an internet provider. You probably do. This provider sometimes performs scheduled maintenance, resulting in your internet temporarily disconnecting. Now imagine there’s no way of getting notified about future maintenance windows, unless you check their outages page every day. Annoying, but we can do something about that with a bit of code.</p>

<p>This was not a hypothetical situation for me and I figured I could automate the process with a script, like any developer would. Unfortunately, internet providers are seldom developer friendly, so there was no API that I could tap into. There was only a customer dashboard with a list of current and future outages, which I would have to scrape.</p>

<p>While I realise not everyone is facing this <em>exact</em> problem, I’m sure people find themselves needing to automate something on archaic websites from time to time, so hopefully this article is useful to them. To avoid making a target out of any real website, I built a simple HTML mock that we will be scraping instead.</p>

<h2 id="research">Research</h2>

<p>Step one is researching the problem space. There are three major parts:</p>

<ol>
  <li>Obtaining the outages</li>
  <li>Serving them</li>
  <li>Hosting the code away from your computer</li>
</ol>

<p>I haven’t scraped before, but 5 minutes of research showed <a href="https://github.com/SeleniumHQ/selenium">Selenium</a> to be a common solution. You have a lot of language choice here, including Java (and anything interoperable, like Kotlin), C#, JavaScript, Python and Ruby. Since I spend most of my day job writing Python (for data/ML), I picked that and you can follow along with any other language you prefer.</p>

<p><img src="https://gouline.net/img/posts/sK2w1K-KXxKm8XsRQuzqig.webp" alt="Cheese grater" />
<small>Photo by <a href="https://unsplash.com/@sigmund">Sigmund</a> on <a href="https://unsplash.com/s/photos/grater">Unsplash</a></small></p>

<p>My first idea for serving the outages was sending notifications via email or SMS, but how do you avoid forgetting right after receiving them? You create an event in your calendar! So why not skip the intermediate step and create a calendar that you can just subscribe to, like public holidays or sporting calendars. All you have to do is generate a static <a href="https://en.wikipedia.org/wiki/ICalendar">iCalendar</a> file and host it somewhere.</p>

<p>This brings me to the final piece — hosting. There’s no need for a request-response type application here, because the outages are unlikely to change too frequently, so you really just need a scheduled fetch operation that updates the iCal file and hosts it for your calendar app or service to synchronise. The simplest approach I came up with is to run it as a scheduled GitHub Actions workflow and host the static file as a Gist. If you have access to AWS, Google Cloud or Azure, you can just as easily use a scheduled serverless function and blob storage, e.g. Lambda that writes to a public S3 bucket, triggered via CloudWatch Events.</p>

<h2 id="code">Code</h2>

<p>Let’s look at the code. This section will only cover some snippets of code to give you a feel for how things work, you can find the complete working project at <a href="https://github.com/gouline/outages">https://github.com/gouline/outages</a>.</p>

<h3 id="website">Website</h3>

<p>You will obviously skip this part when scraping a real website, but to avoid pissing off some webmasters, I used the power of GitHub Pages to create a mock login page that redirects to a static list of outages (regardless of what username and password you entered):</p>

<ol>
  <li>Create two static HTML pages: <code class="language-plaintext highlighter-rouge">login.html</code> and <code class="language-plaintext highlighter-rouge">outages.html</code></li>
  <li>Put them under <code class="language-plaintext highlighter-rouge">/docs</code> in the GitHub repository</li>
  <li>Go to the repository ‘Settings’, choose the ‘Pages’ tab, and enable GitHub Pages for the primary branch and the <code class="language-plaintext highlighter-rouge">/docs</code> directory</li>
  <li>The two pages are now hosted under <code class="language-plaintext highlighter-rouge">https://[USERNAME].github.io/[REPOSITORY]/</code> (if you have a custom domain associated with the main GitHub Pages repository, this will redirect and still work)</li>
</ol>

<p>Now we have something to scrape.</p>

<h3 id="scraping">Scraping</h3>

<p>For those of you who have never scraped websites before, the process looks roughly like writing HTML files in reverse. You inspect the page in your browser, find the information that you want to grab, and think about how you would traverse down the DOM, by tag, IDs and classes, to get it.
First, download the <a href="https://chromedriver.chromium.org/">ChromeDriver</a> and put it somewhere in your executable path. Then install the Selenium binding for Python:</p>

<div class="language-shell highlighter-rouge"><div class="highlight"><pre class="highlight"><code>pip <span class="nb">install </span>selenium
</code></pre></div></div>

<p>Here’s how you instantiate a simple headless driver:</p>

<div class="language-python highlighter-rouge"><div class="highlight"><pre class="highlight"><code><span class="kn">from</span> <span class="n">selenium</span> <span class="kn">import</span> <span class="n">webdriver</span>
<span class="kn">from</span> <span class="n">selenium.webdriver.chrome.options</span> <span class="kn">import</span> <span class="n">Options</span>

<span class="n">chrome_options</span> <span class="o">=</span> <span class="nc">Options</span><span class="p">()</span>
<span class="n">chrome_options</span><span class="p">.</span><span class="nf">add_argument</span><span class="p">(</span><span class="sh">"</span><span class="s">--headless</span><span class="sh">"</span><span class="p">)</span>
<span class="n">driver</span> <span class="o">=</span> <span class="n">webdriver</span><span class="p">.</span><span class="nc">Chrome</span><span class="p">(</span><span class="n">options</span><span class="o">=</span><span class="n">chrome_options</span><span class="p">)</span>
</code></pre></div></div>

<p>When troubleshooting unexpected behaviour, you can temporarily comment out the <code class="language-plaintext highlighter-rouge">--headless</code> line to see what the code sees in a separate Chrome window (you can even inspect the page).
The driver throws errors whenever something cannot be found, so it’s a good idea to surround whatever you are doing with a try-finally statement to make sure you close it, even if something goes wrong.</p>

<div class="language-python highlighter-rouge"><div class="highlight"><pre class="highlight"><code><span class="k">try</span><span class="p">:</span>
    <span class="n">outages</span> <span class="o">=</span> <span class="nf">get_outages</span><span class="p">(</span><span class="n">driver</span><span class="p">)</span>
<span class="k">finally</span><span class="p">:</span>
    <span class="n">driver</span><span class="p">.</span><span class="nf">close</span><span class="p">()</span>
</code></pre></div></div>

<p>To load a page, you just <code class="language-plaintext highlighter-rouge">get</code> it:</p>

<div class="language-python highlighter-rouge"><div class="highlight"><pre class="highlight"><code><span class="n">driver</span><span class="p">.</span><span class="nf">get</span><span class="p">(</span><span class="sh">"</span><span class="s">https://gouline.github.io/internet-outages/provider/login.html</span><span class="sh">"</span><span class="p">)</span>
</code></pre></div></div>

<p>Now let’s fill out the credentials and submit the form:</p>

<div class="language-python highlighter-rouge"><div class="highlight"><pre class="highlight"><code><span class="kn">import</span> <span class="n">os</span>

<span class="n">username</span> <span class="o">=</span> <span class="n">os</span><span class="p">.</span><span class="nf">getenv</span><span class="p">(</span><span class="sh">"</span><span class="s">PROVIDER_USERNAME</span><span class="sh">"</span><span class="p">)</span>
<span class="n">password</span> <span class="o">=</span> <span class="n">os</span><span class="p">.</span><span class="nf">getenv</span><span class="p">(</span><span class="sh">"</span><span class="s">PROVIDER_PASSWORD</span><span class="sh">"</span><span class="p">)</span>

<span class="n">driver</span><span class="p">.</span><span class="nf">find_element_by_id</span><span class="p">(</span><span class="sh">"</span><span class="s">username</span><span class="sh">"</span><span class="p">).</span><span class="nf">send_keys</span><span class="p">(</span><span class="n">username</span><span class="p">)</span>
<span class="n">driver</span><span class="p">.</span><span class="nf">find_element_by_id</span><span class="p">(</span><span class="sh">"</span><span class="s">password</span><span class="sh">"</span><span class="p">).</span><span class="nf">send_keys</span><span class="p">(</span><span class="n">password</span><span class="p">)</span>
<span class="n">driver</span><span class="p">.</span><span class="nf">find_element_by_tag_name</span><span class="p">(</span><span class="sh">"</span><span class="s">form</span><span class="sh">"</span><span class="p">).</span><span class="nf">submit</span><span class="p">()</span>
</code></pre></div></div>

<p>Most of the time you will be using <code class="language-plaintext highlighter-rouge">find_element_by_id</code>, <code class="language-plaintext highlighter-rouge">find_element_by_tag_name</code> or <code class="language-plaintext highlighter-rouge">find_element_by_class_name</code> for simple parsing. All these return the first matching element and throw an error if they cannot find it. You can also use their plural variants (e.g. <code class="language-plaintext highlighter-rouge">find_elements_by_tag_name</code>) to return a list of matching elements that you can loop through.</p>

<p>After a page redirect, you can use this to wait until the new page title contains the text “Outages”, to avoid errors just because the page hasn’t loaded yet:</p>

<div class="language-python highlighter-rouge"><div class="highlight"><pre class="highlight"><code><span class="kn">from</span> <span class="n">selenium.webdriver.support.ui</span> <span class="kn">import</span> <span class="n">WebDriverWait</span>
<span class="kn">from</span> <span class="n">selenium.webdriver.support</span> <span class="kn">import</span> <span class="n">expected_conditions</span> <span class="k">as</span> <span class="n">EC</span>

<span class="nc">WebDriverWait</span><span class="p">(</span><span class="n">driver</span><span class="p">,</span> <span class="mi">10</span><span class="p">).</span><span class="nf">until</span><span class="p">(</span><span class="n">EC</span><span class="p">.</span><span class="nf">title_contains</span><span class="p">(</span><span class="sh">"</span><span class="s">Outages</span><span class="sh">"</span><span class="p">))</span>
</code></pre></div></div>

<p>Now we loop through the elements with the class <code class="language-plaintext highlighter-rouge">list-group-item</code> that we know contain each outage on the mock page and then find the <code class="language-plaintext highlighter-rouge">container</code> class inside with each attribute of that outage:</p>

<div class="language-python highlighter-rouge"><div class="highlight"><pre class="highlight"><code><span class="n">outages</span> <span class="o">=</span> <span class="p">[]</span>

<span class="k">for</span> <span class="n">i</span> <span class="ow">in</span> <span class="n">driver</span><span class="p">.</span><span class="nf">find_elements_by_class_name</span><span class="p">(</span><span class="sh">"</span><span class="s">list-group-item</span><span class="sh">"</span><span class="p">):</span>
    <span class="n">outage</span> <span class="o">=</span> <span class="nc">Outage</span><span class="p">()</span>

    <span class="k">for</span> <span class="n">c</span> <span class="ow">in</span> <span class="n">i</span><span class="p">.</span><span class="nf">find_elements_by_class_name</span><span class="p">(</span><span class="sh">"</span><span class="s">container</span><span class="sh">"</span><span class="p">):</span>
        <span class="n">title</span> <span class="o">=</span> <span class="n">c</span><span class="p">.</span><span class="nf">find_element_by_tag_name</span><span class="p">(</span><span class="sh">"</span><span class="s">strong</span><span class="sh">"</span><span class="p">).</span><span class="n">text</span>
        <span class="n">value</span> <span class="o">=</span> <span class="n">c</span><span class="p">.</span><span class="nf">find_element_by_tag_name</span><span class="p">(</span><span class="sh">"</span><span class="s">p</span><span class="sh">"</span><span class="p">).</span><span class="n">text</span>

        <span class="n">outage</span><span class="p">.</span><span class="nf">put_attribute</span><span class="p">(</span><span class="n">title</span><span class="p">,</span> <span class="n">value</span><span class="p">)</span>

    <span class="n">outages</span><span class="p">.</span><span class="nf">append</span><span class="p">(</span><span class="n">outage</span><span class="p">)</span>
</code></pre></div></div>

<p>Corresponding HTML for reference:</p>

<div class="language-html highlighter-rouge"><div class="highlight"><pre class="highlight"><code><span class="nt">&lt;div</span> <span class="na">class=</span><span class="s">"list-group-item"</span><span class="nt">&gt;</span>
  <span class="nt">&lt;div</span> <span class="na">class=</span><span class="s">"container"</span><span class="nt">&gt;</span>
    <span class="nt">&lt;strong&gt;</span>Start<span class="nt">&lt;/strong&gt;</span>
    <span class="nt">&lt;p&gt;</span>Thu 10 Jun 2021 12:00AM PST<span class="nt">&lt;/p&gt;</span>
  <span class="nt">&lt;/div&gt;</span>
  <span class="nt">&lt;div</span> <span class="na">class=</span><span class="s">"container"</span><span class="nt">&gt;</span>
    <span class="nt">&lt;strong&gt;</span>End<span class="nt">&lt;/strong&gt;</span>
    <span class="nt">&lt;p&gt;</span>Thu 10 Jun 2021 07:00AM PST<span class="nt">&lt;/p&gt;</span>
  <span class="nt">&lt;/div&gt;</span>
  <span class="nt">&lt;div</span> <span class="na">class=</span><span class="s">"container"</span><span class="nt">&gt;</span>
    <span class="nt">&lt;strong&gt;</span>Severity<span class="nt">&lt;/strong&gt;</span>
    <span class="nt">&lt;p&gt;</span>High<span class="nt">&lt;/p&gt;</span>
  <span class="nt">&lt;/div&gt;</span>
<span class="nt">&lt;/div&gt;</span>
</code></pre></div></div>

<p>Notice how you can call <code class="language-plaintext highlighter-rouge">find_*</code> functions on the driver for the whole page <em>or</em> recursively on any returned elements. Be careful with <code class="language-plaintext highlighter-rouge">find_element_*</code> functions because they throw <code class="language-plaintext highlighter-rouge">NoSuchElementException</code> when they cannot find what you are looking for, so if this is expected, make sure to surround them with a try-catch statement.</p>

<p>That about covers the overall parsing principle. Unfortunately, in most real-world use cases, HTML gets complex quickly and you will have to resort to <code class="language-plaintext highlighter-rouge">find_element_by_xpath</code>, but <a href="https://en.wikipedia.org/wiki/XPath">XPath</a> syntax is way too broad to cover in this article, so I will leave it up to the reader to explore the <a href="https://selenium-python.readthedocs.io/locating-elements.html#locating-by-xpath">documentation</a>.</p>

<h3 id="generating-calendar">Generating Calendar</h3>

<p>Now that we have some outages, we need to generate the iCal file. If you’ve never seen one, here is what an example one looks like:</p>

<div class="language-plaintext highlighter-rouge"><div class="highlight"><pre class="highlight"><code>BEGIN:VCALENDAR
VERSION:2.0
BEGIN:VEVENT
DESCRIPTION:Scheduled maintenance
DTSTART:20210101T000000Z
SUMMARY:Event Name
UID:TEST-UID-1
END:VEVENT
END:VCALENDAR
</code></pre></div></div>

<p>As you can see, it wouldn’t take much to generate it manually, but fortunately, <a href="https://github.com/ics-py/ics-py">ics.py</a> exists so we don’t have to. You can install it like so:</p>

<div class="language-shell highlighter-rouge"><div class="highlight"><pre class="highlight"><code>pip <span class="nb">install </span>ics
</code></pre></div></div>

<p>Given a list of outages that we scraped before, we add them as events:</p>

<div class="language-python highlighter-rouge"><div class="highlight"><pre class="highlight"><code><span class="kn">import</span> <span class="n">ics</span>

<span class="n">cal</span> <span class="o">=</span> <span class="n">ics</span><span class="p">.</span><span class="nc">Calendar</span><span class="p">()</span>

<span class="k">for</span> <span class="n">outage</span> <span class="ow">in</span> <span class="n">outages</span><span class="p">:</span>
    <span class="n">event</span> <span class="o">=</span> <span class="n">ics</span><span class="p">.</span><span class="nc">Event</span><span class="p">(</span>
         <span class="n">name</span><span class="o">=</span><span class="n">outage</span><span class="p">.</span><span class="n">name</span><span class="p">,</span>
         <span class="n">begin</span><span class="o">=</span><span class="n">outage</span><span class="p">.</span><span class="n">start</span><span class="p">.</span><span class="nf">timestamp</span><span class="p">(),</span>
         <span class="n">end</span><span class="o">=</span><span class="n">outage</span><span class="p">.</span><span class="n">end</span><span class="p">.</span><span class="nf">timestamp</span><span class="p">(),</span>
         <span class="n">uid</span><span class="o">=</span><span class="n">outage</span><span class="p">.</span><span class="n">uid</span><span class="p">,</span>
         <span class="n">description</span><span class="o">=</span><span class="n">outage</span><span class="p">.</span><span class="nf">description</span><span class="p">(),</span>
    <span class="p">)</span>
    <span class="n">cal</span><span class="p">.</span><span class="n">events</span><span class="p">.</span><span class="nf">add</span><span class="p">(</span><span class="n">event</span><span class="p">)</span>
</code></pre></div></div>

<p>While most arguments are self-explanatory, an important note about <code class="language-plaintext highlighter-rouge">uid</code> — the unique identifier for each event — is that it <em>can</em> be omitted, but it’s then generated randomly every time the file is updated. Depending on how your calendar app or service handles synchronisation, this may cause undesirable behaviour, since technically all events will be brand new at each refresh.</p>

<p>Finally, we write the calendar to a plaintext file:</p>

<div class="language-python highlighter-rouge"><div class="highlight"><pre class="highlight"><code><span class="k">with</span> <span class="nf">open</span><span class="p">(</span><span class="n">filename</span><span class="p">,</span> <span class="sh">"</span><span class="s">w</span><span class="sh">"</span><span class="p">)</span> <span class="k">as</span> <span class="n">f</span><span class="p">:</span>
    <span class="n">f</span><span class="p">.</span><span class="nf">writelines</span><span class="p">(</span><span class="n">cal</span><span class="p">)</span>
</code></pre></div></div>

<h3 id="github-actions">GitHub Actions</h3>

<p>Now that we have some Python code that we can run locally, we want to run it somewhere on a schedule, say daily. Here’s how you can configure GitHub Actions to do that.</p>

<p>By default, Actions are enabled for all GitHub repositories, so all you have to do is create a workflow configuration. Let’s create <code class="language-plaintext highlighter-rouge">.github/workflows/deploy.yml</code> and start filling it in.</p>

<p>First, we specify what triggers this workflow. We want it to run on a schedule:</p>

<div class="language-yaml highlighter-rouge"><div class="highlight"><pre class="highlight"><code><span class="na">on</span><span class="pi">:</span>
  <span class="na">schedule</span><span class="pi">:</span>
    <span class="pi">-</span> <span class="na">cron</span><span class="pi">:</span> <span class="s2">"</span><span class="s">0</span><span class="nv"> </span><span class="s">5,17</span><span class="nv"> </span><span class="s">*</span><span class="nv"> </span><span class="s">*</span><span class="nv"> </span><span class="s">*"</span>
</code></pre></div></div>

<p>This example makes it trigger at 5:00 and 17:00 (UTC) every day. For more options, refer to <a href="https://docs.github.com/en/actions/reference/events-that-trigger-workflows#schedule">documentation</a>.</p>

<p>Next, we define what steps need to be executed and on what platform:</p>

<div class="language-yaml highlighter-rouge"><div class="highlight"><pre class="highlight"><code><span class="na">jobs</span><span class="pi">:</span>
  <span class="na">run</span><span class="pi">:</span>
    <span class="na">runs-on</span><span class="pi">:</span> <span class="s">ubuntu-latest</span>
    <span class="na">name</span><span class="pi">:</span> <span class="s">run</span>
    <span class="na">steps</span><span class="pi">:</span>
      <span class="pi">-</span> <span class="na">uses</span><span class="pi">:</span> <span class="s">actions/checkout@v2</span>
</code></pre></div></div>

<p>Remember how you had to install the ChromeDriver before? This needs to be done on the CI runner as well. Thankfully, there’s the <a href="https://github.com/marketplace/actions/setup-chromedriver">setup-chromedriver</a> action on the Marketplace for that:</p>

<div class="language-yaml highlighter-rouge"><div class="highlight"><pre class="highlight"><code> <span class="pi">-</span> <span class="na">uses</span><span class="pi">:</span> <span class="s">nanasess/setup-chromedriver@master</span>
</code></pre></div></div>

<p>We need to install Python dependencies:</p>

<div class="language-yaml highlighter-rouge"><div class="highlight"><pre class="highlight"><code> <span class="pi">-</span> <span class="na">name</span><span class="pi">:</span> <span class="s">Requirements</span>
        <span class="s">run</span><span class="err">:</span> <span class="s">pip3 install selenium ics</span>
</code></pre></div></div>

<p>And run the Python scraper we wrote earlier:</p>

<div class="language-yaml highlighter-rouge"><div class="highlight"><pre class="highlight"><code> <span class="pi">-</span> <span class="na">name</span><span class="pi">:</span> <span class="s">Run</span>
        <span class="s">run</span><span class="err">:</span> <span class="s">python3 outages.py</span>
        <span class="s">env</span><span class="err">:</span>
          <span class="na">PROVIDER_USERNAME</span><span class="pi">:</span> <span class="s">$</span>
          <span class="na">PROVIDER_PASSWORD</span><span class="pi">:</span> <span class="s">$</span>
</code></pre></div></div>

<p>Presumably, you will need to save those credentials we used to log into the website we were scraping. <strong>Never store credentials in plaintext in your repository!</strong> You can store them as <a href="https://docs.github.com/en/actions/reference/encrypted-secrets">encrypted secrets</a> instead. Just go to ‘Settings’ in your repository, then the ‘Secrets’ tab, and create two secrets called <code class="language-plaintext highlighter-rouge">PROVIDER_USERNAME</code> and <code class="language-plaintext highlighter-rouge">PROVIDER_PASSWORD</code>, referenced above.</p>

<p><img src="https://gouline.net/img/posts/zJZwg8O591sEHz2tN0E8cg.webp" alt="Repository secrets" /></p>

<p>Finally, we need a way to upload the resulting calendar file to GitHub Gist. We could do it manually via the API, but we’re all busy people, so there’s another Marketplace action called <a href="https://github.com/marketplace/actions/deploy-to-gist">deploy-to-gist</a> to do it for us:</p>

<div class="language-yaml highlighter-rouge"><div class="highlight"><pre class="highlight"><code><span class="pi">-</span> <span class="na">name</span><span class="pi">:</span> <span class="s">Deploy</span>
  <span class="na">uses</span><span class="pi">:</span> <span class="s">exuanbo/actions-deploy-gist@v1</span>
  <span class="na">with</span><span class="pi">:</span>
    <span class="na">token</span><span class="pi">:</span> <span class="s">$</span>
    <span class="na">gist_id</span><span class="pi">:</span> <span class="s">YOUR_GIST_ID</span>
    <span class="na">gist_file_name</span><span class="pi">:</span> <span class="s">outages.ics</span>
    <span class="na">file_path</span><span class="pi">:</span> <span class="s">./dist/outages.ics</span>
</code></pre></div></div>

<p>The field <code class="language-plaintext highlighter-rouge">gist_file_name</code> controls the name of the file in the target gist and <code class="language-plaintext highlighter-rouge">file_path</code> is where to find the file to upload after executing the Python script. Two more configuration steps before we’re done though:</p>

<ol>
  <li>Go to <a href="https://gist.github.com/">https://gist.github.com/</a> and create an empty gist — the <code class="language-plaintext highlighter-rouge">gist_id</code> will be in the URL, i.e. <code class="language-plaintext highlighter-rouge">https://gist.github.com/[USERNAME]/**[GIST_ID]**</code></li>
  <li>Create a <a href="https://github.com/settings/tokens">personal access token</a> with scope “Create gists” and save it as a repository secret <code class="language-plaintext highlighter-rouge">GIST_TOKEN</code> (same as the website credentials before) — this gives the workflow permission to edit your gist</li>
</ol>

<p>Done! If you followed the instructions correctly, your workflow will now run on schedule and upload your calendar file to GitHub Gist.
To synchronise your calendar app or service with your generated calendar, point it to this URL (with your values) <code class="language-plaintext highlighter-rouge">https://gist.githubusercontent.com/**[USERNAME]**/**[GIST_ID]**/raw</code> — this exposes your gist as a raw file that can be downloaded.</p>

<h3 id="optimisations">Optimisations</h3>

<p>If you looked at the GitHub repository I linked to in the beginning, you would have noticed a few additional things not discussed in this article that you may want to consider doing in your own repository, especially if you are new to Python:</p>

<ul>
  <li>Create a build script, such as a <code class="language-plaintext highlighter-rouge">Makefile</code> and/or <code class="language-plaintext highlighter-rouge">setup.py</code>, and call its targets from the CI workflow, instead of explicit commands</li>
  <li>Extract your dependencies into <code class="language-plaintext highlighter-rouge">requirements.txt</code> and install them all at once with <code class="language-plaintext highlighter-rouge">pip install -r requirements.txt</code></li>
  <li>Separate your Python code into multiple files as needed and put them all in a directory called <code class="language-plaintext highlighter-rouge">outages</code> (with an <code class="language-plaintext highlighter-rouge">__init__.py</code> file), so that you can call it as a module with <code class="language-plaintext highlighter-rouge">python -m outages</code> (more on that <a href="https://realpython.com/run-python-scripts/">here</a>)</li>
  <li>Write tests! It may be a small throwaway project, but it’s still a good idea to write at least some basic unit and integration tests</li>
</ul>

<p>Having said that, I purposely only focused on things relevant to scraping websites and generating the calendar file. How to structure Python projects is out of scope for what I wanted to address and your implementation will be different, depending on what website you are scraping and how you want to approach it, anyway.</p>

<h2 id="closing-thoughts">Closing Thoughts</h2>

<p>Hopefully, this was helpful for somebody facing a similar task. Web scraping is a massive topic that’s impossible to cover in one article and that was not my intention. This was more of a walk-through of a weekend project where you approach a real-world problem with a can-do attitude and some basic programming skills.</p>

<p>As I mentioned in the research section, GitHub Actions was picked purely because it’s simple and free, but it’s by no means the only, or even the nicest, option. Hosting the Python script on a cloud platform, such as AWS, Azure or Google Cloud, is left as an exercise for the reader. Feel free to contribute your setup in the comments and I will happily include it in the footnotes.</p>

<p>Thank you for reading!</p>]]></content><author><name>Mike Gouline</name></author><category term="python" /><category term="github" /><summary type="html"><![CDATA[Imagine you have an internet provider. You probably do. This provider sometimes performs scheduled maintenance, resulting in your internet temporarily disconnecting. Now imagine there’s no way of getting notified about future maintenance windows, unless you check their outages page every day. Annoying, but we can do something about that with a bit of code.]]></summary><media:thumbnail xmlns:media="http://search.yahoo.com/mrss/" url="https://gouline.net/img/posts/sK2w1K-KXxKm8XsRQuzqig.webp" /><media:content medium="image" url="https://gouline.net/img/posts/sK2w1K-KXxKm8XsRQuzqig.webp" xmlns:media="http://search.yahoo.com/mrss/" /></entry><entry><title type="html">ADS-B Feeders on Raspberry Pi</title><link href="https://gouline.net/2020/10/26/ads-b-feeders-on-raspberry-pi.html" rel="alternate" type="text/html" title="ADS-B Feeders on Raspberry Pi" /><published>2020-10-26T00:00:00+00:00</published><updated>2026-04-09T10:38:20+00:00</updated><id>https://gouline.net/2020/10/26/ads-b-feeders-on-raspberry-pi</id><content type="html" xml:base="https://gouline.net/2020/10/26/ads-b-feeders-on-raspberry-pi.html"><![CDATA[<p>I happen to be an aviation nerd and flight tracking services enable aviation nerds to learn a lot about any aircraft flying over. Where it’s going, where it’s coming from, why it’s flying over my house at 6AM after I went to bed only 4 hours ago. Important stuff.</p>

<p>In this article, I explain how you can become a part of this process by using a Raspberry Pi to capture and feed ADS-B data to the top four most popular tracking services.</p>

<p><img src="https://gouline.net/img/posts/qqQnvvRB-4lKMZuZt0co-Q.webp" alt="dump1090" /></p>

<h2 id="introduction">Introduction</h2>

<p>You’ve likely used or heard of <a href="https://www.flightradar24.com/">Flightradar24</a>, <a href="https://flightaware.com/">FlightAware</a>, <a href="https://www.radarbox.com/">RadarBox</a>, and <a href="https://planefinder.net/">Plane Finder</a> before. Most of their coverage comes from regular people capturing live <a href="https://en.wikipedia.org/wiki/Automatic_dependent_surveillance_%E2%80%93_broadcast">ADS-B</a> data, broadcast by nearby aircraft on 1090 MHz and 978 MHz (US-only) frequencies, with some form of software-defined radio (SDR), and feeding it to them with a computer or a mobile device.</p>

<p>Why? Beyond the cool factor, most of them offer a free premium account for your trouble, which is handy if you track planes frequently and want some advanced features. Next question is “how” then.</p>

<p><img src="https://gouline.net/img/posts/UaZWdCtTiCOJmQ0R.webp" alt="FlightAware's FlightFeeder Orange" /></p>

<p>If you live in a remote area with poor existing coverage, you can apply for a free professional receiver at <a href="https://www.flightradar24.com/apply-for-receiver">Flightradar24</a>, <a href="https://flightaware.com/adsb/request">FlightAware</a>, <a href="https://www.radarbox.com/addcoverage">RadarBox</a>, or <a href="https://planefinder.net/about/free-ads-b-receiver/">Plane Finder</a>. The only caveat is that you have to install it on your roof or a tall mast with unobstructed 360-degree view of the sky and a 24/7 internet connection. These receivers are also black boxes with an Ethernet port, so you won’t be able to install any third-party software on them, in case you also want to tinker with ADS-B data yourself.</p>

<p>For everyone else who lives in a large city with plenty of coverage or has no ability to install suspicious-looking equipment on the roof of their apartment building, your best bet is building a DIY receiver of your own.</p>

<h2 id="hardware">Hardware</h2>

<p>You can install ADS-B feeder software on almost any computer. But remember that you’ll be running it 24/7, so it’s probably unwise to install it on your main laptop or desktop. Unless you already have a rack of servers, the cheapest and most energy-efficient option is a Raspberry Pi.</p>

<p><img src="https://gouline.net/img/posts/NDSofQadUsTOY5ac.webp" alt="Raspberry Pi 4" /></p>

<p>Exact model makes no difference, I’ve installed feeders on first-generation Model B and Zero W without issues. So long as it has one free USB port and an internet connection (i.e. you have a wired router nearby or your Pi has Wi-Fi), it’s good enough.</p>

<p>You will also need an SDR adapter with an external antenna. This can be anything from a cheap DVB-T USB dongle with a small magnetic antenna for $10 off eBay, all the way up to a purpose-built ADS-B receiver with an outdoor fibreglass antenna for $100+ (most tracking services can sell you one on their website). Either option will work, but cheaper equipment and lazier antenna positioning will get you significantly shorter range (5–10 NM) compared to a more serious setup (100–200 NM). It all depends on your budget and level of enthusiasm.</p>

<h2 id="software">Software</h2>

<p>You have some options for the software part as well. If your Raspberry Pi will only be used for feeding data to FlightAware or Flightradar24, the easiest option is installing their pre-made OS images, <a href="https://flightaware.com/adsb/piaware/build">PiAware</a> or <a href="https://www.flightradar24.com/build-your-own">Pi24</a>, respectively.</p>

<p>But if you want to feed data to multiple services or you want to simultaneously use your Raspberry Pi for other tasks, keep reading.</p>

<h3 id="0-raspberry-pi-os">0. Raspberry Pi OS</h3>

<p>Let’s start by downloading <a href="https://www.raspberrypi.org/downloads/">Raspberry Pi OS</a> (formerly, Raspbian), the official Debian Linux-based operating system made for all Raspberry Pi models. If you intend to run it headless (no monitor, no keyboard), I would recommend Raspberry Pi OS Lite, but full desktop version would work too. Follow the instructions on the website to write it to your SD card.</p>

<p><img src="https://gouline.net/img/posts/49v40AoSrlWNhxXs.webp" alt="Raspberry Pi" /></p>

<p>Now insert the SD card into your Pi and turn the power supply on. Unless you have a console cable, you will have to connect a monitor and keyboard initially, to enable SSH and/or VNC to control it remotely.</p>

<p>Once the system boots, log in with the default username “pi” and password “raspberry” and run <code class="language-plaintext highlighter-rouge">sudo raspi-config</code> to do some basic configuration:</p>

<ul>
  <li>Change the default password!</li>
  <li>Under locale settings, set time zone to UTC (required by some feeders)</li>
  <li>Enable SSH and/or VNC, depending on how you plan to control your Pi in the future; optionally, change the hostname to something unique, like <code class="language-plaintext highlighter-rouge">radarpi</code>, that way you can address it as <code class="language-plaintext highlighter-rouge">radarpi.local</code> on your network, instead of configuring a static IP</li>
</ul>

<p>Before we go any further, it’s not a bad idea to install any available OS updates by running <code class="language-plaintext highlighter-rouge">sudo apt-get update</code> and then <code class="language-plaintext highlighter-rouge">sudo apt-get upgrade</code>.</p>

<h3 id="1-flightaware">1. FlightAware</h3>

<p>Always install FlightAware first, because its PiAware packages include a working version of <code class="language-plaintext highlighter-rouge">dump1090</code> and <code class="language-plaintext highlighter-rouge">dump978</code> that other feeders rely on. This avoids having to install them separately, which sometimes causes issues.</p>

<blockquote>
  <p><a href="https://flightaware.com/account/join/">Sign up</a> for a free FlightAware account before going any further.
Follow their <a href="https://flightaware.com/adsb/piaware/install">guide</a>, it boils down to this (replacing with latest version):</p>
</blockquote>

<div class="language-shell highlighter-rouge"><div class="highlight"><pre class="highlight"><code>wget https://flightaware.com/adsb/piaware/files/packages/pool/piaware/p/piaware-support/piaware-repository_4.0_all.deb
<span class="nb">sudo </span>dpkg <span class="nt">-i</span> piaware-repository_4.0_all.deb
<span class="nb">sudo </span>apt-get update
<span class="nb">sudo </span>apt-get <span class="nb">install </span>piaware
<span class="nb">sudo </span>piaware-config allow-auto-updates <span class="nb">yes
sudo </span>piaware-config allow-manual-updates <span class="nb">yes
sudo </span>apt-get <span class="nb">install </span>dump1090-fa dump978-fa
</code></pre></div></div>

<p>All done! Now <a href="https://flightaware.com/adsb/piaware/claim">claim</a> your feeder and it should appear in your <a href="https://flightaware.com/adsb/stats">stats</a>. Here you can edit the location and elevation of your antenna, your closest airport, etc.</p>

<p>You can also now navigate to port 8080 of your Pi in your browser, e.g. <a href="http://radarpi.local:8080/">http://radarpi.local:8080/</a>, for a dashboard that shows you which flights the dump1090 daemon can see.</p>

<h3 id="2-flightradar24">2. Flightradar24</h3>

<p>Flightradar24 provides an easy <a href="https://www.flightradar24.com/share-your-data">installation script</a>, but for me it always fails with a GPG error. So I pieced together a way to install everything manually from various forum posts.</p>

<blockquote>
  <p><a href="https://www.flightradar24.com/premium/signup">Sign up</a> for a free Flightradar24 account before going any further.</p>
</blockquote>

<p>Go to <a href="http://repo.feed.flightradar24.com/fr24feed_versions.json">fr24feed_versions.json</a> to check the latest version available for “linux_arm_deb” platform. At the time of writing, it was 1.0.26–9, so update it to the latest one and execute the following:</p>

<div class="language-shell highlighter-rouge"><div class="highlight"><pre class="highlight"><code>wget http://repo.feed.flightradar24.com/rpi_binaries/fr24feed_1.0.26-9_armhf.deb
<span class="nb">sudo </span>dpkg <span class="nt">--install</span> fr24feed_1.0.26-9_armhf.deb
<span class="nb">sudo </span>fr24feed <span class="nt">--signup</span>
</code></pre></div></div>

<p>You will be asked to type in the email address associated with your account and other details, such as the sharing key (which you can leave blank if this is your first feeder) and your antenna location.</p>

<p>Finally, just run this to restart the client and start feeding data:</p>

<div class="language-shell highlighter-rouge"><div class="highlight"><pre class="highlight"><code><span class="nb">sudo </span>systemctl restart fr24feed
</code></pre></div></div>

<p>Your feeder should now appear under <a href="https://www.flightradar24.com/account/data-sharing">data sharing</a> in your account.</p>

<h3 id="3-airnav-radarbox">3. AirNav RadarBox</h3>

<p>RadarBox also provides an <a href="https://www.radarbox.com/raspberry-pi/guide">installation script</a> and this one worked for me.</p>

<blockquote>
  <p><a href="https://www.radarbox.com/register">Sign up</a> for a free RadarBox account before going any further.</p>
</blockquote>

<p>Here’s what you need to execute:</p>

<div class="language-shell highlighter-rouge"><div class="highlight"><pre class="highlight"><code><span class="nb">sudo </span>bash <span class="nt">-c</span> <span class="s2">"</span><span class="si">$(</span>wget <span class="nt">-O</span> - <span class="o">[</span>http://apt.rb24.com/inst_rbfeeder.sh]<span class="o">(</span>http://apt.rb24.com/inst_rbfeeder.sh<span class="o">)</span><span class="si">)</span><span class="s2">"</span>
<span class="nb">sudo </span>apt-get <span class="nb">install </span>mlat-client
<span class="nb">sudo </span>systemctl restart rbfeeder
<span class="nb">sudo </span>rbfeeder <span class="nt">--showkey</span> <span class="nt">--no-start</span>
</code></pre></div></div>

<p>Once it shows you the key, all you have to do is <a href="https://www.radarbox.com/raspberry-pi/claim">claim</a> it.</p>

<p>You can check your sharing status, including flights your feeder can see and your coverage, by going to Account &gt; Stations and selecting the name of your station.</p>

<h3 id="4-plane-finder">4. Plane Finder</h3>

<p>Last one is Plane Finder. This feeder is just a single Debian <a href="https://planefinder.net/coverage/client">package</a> with instructions in a PDF file.</p>

<blockquote>
  <p><a href="https://planefinder.net/account/login/">Sign up</a> for a free Plane Finder account before going any further.</p>
</blockquote>

<p>Instructions boil down to this (replacing with latest version):</p>

<div class="language-shell highlighter-rouge"><div class="highlight"><pre class="highlight"><code>wget <span class="o">[</span>http://client.planefinder.net/pfclient_4.1.1_armhf.deb]<span class="o">(</span>http://client.planefinder.net/pfclient_4.1.1_armhf.deb<span class="o">)</span>
<span class="nb">sudo </span>dpkg <span class="nt">-i</span> pfclient_4.1.1_armhf.deb
</code></pre></div></div>

<p>Once installed, navigate to port 30053 of your Pi in your browser, e.g. <a href="http://radarpi.local:30053/">http://radarpi.local:30053/</a>, fill out your account email address, and the latitude and longitude of your antenna.</p>

<p>Then select “Beast” and type in “127.0.0.1” for the IP address and “30005” for the port (output for dump1090’s <a href="https://wiki.jetvision.de/wiki/Mode-S_Beast:Data_Output_Formats">Mode-S Beast</a> binary format) and take note of the generated share code. Plane Finder will also automatically email it to you, in case you lose it.</p>

<p>Finally, navigate to <a href="https://planefinder.net/account/receivers">receivers</a> in your account, enter the share code and click “Add receiver”. Eventually, “inactive” should switch to “active” — this took around 15–20 minutes for me (much longer than with other services).</p>

<h2 id="conclusion">Conclusion</h2>

<p>Congratulations, you’re now feeding to four flight tracking services simultaneously. After a while (within an hour), all your accounts should switch to “premium”, “business” or “enterprise”, depending on what each service is offering in exchange for sharing data.</p>

<p>Keep an eye out on sharing stats to see how many flights and positions your feeder captures, and what your range is. If you’re unhappy with these results, try moving your antenna closer to the window and raising it higher. Alternatively, you can go out and purchase a better USB dongle and/or a bigger antenna. Either way, your existing Raspberry Pi setup won’t change.</p>

<p><img src="https://gouline.net/img/posts/T97zfoi6ReYSE8NiyDSHHA.webp" alt="Daily availability" /></p>

<p>My last point is a “life hack” unrelated to aviation. Flightradar24 has a useful setting to notify you when your feeder is offline and display a graph of your uptime. This is surprisingly handy for checking your internet connection, in case you need to yell at your ISP for an all-night outage or decide whether you should stay at work a little longer because your home internet is dead. Enjoy!</p>]]></content><author><name>Mike Gouline</name></author><category term="raspberry-pi" /><category term="aviation" /><summary type="html"><![CDATA[I happen to be an aviation nerd and flight tracking services enable aviation nerds to learn a lot about any aircraft flying over. Where it’s going, where it’s coming from, why it’s flying over my house at 6AM after I went to bed only 4 hours ago. Important stuff.]]></summary><media:thumbnail xmlns:media="http://search.yahoo.com/mrss/" url="https://gouline.net/img/posts/qqQnvvRB-4lKMZuZt0co-Q.webp" /><media:content medium="image" url="https://gouline.net/img/posts/qqQnvvRB-4lKMZuZt0co-Q.webp" xmlns:media="http://search.yahoo.com/mrss/" /></entry><entry><title type="html">Data Team as an Optimisation Problem</title><link href="https://gouline.net/2020/07/09/data-team-as-an-optimisation-problem.html" rel="alternate" type="text/html" title="Data Team as an Optimisation Problem" /><published>2020-07-09T00:00:00+00:00</published><updated>2026-04-09T10:38:20+00:00</updated><id>https://gouline.net/2020/07/09/data-team-as-an-optimisation-problem</id><content type="html" xml:base="https://gouline.net/2020/07/09/data-team-as-an-optimisation-problem.html"><![CDATA[<p>Many (if not most) companies reach a point when data becomes a priority. This implies building out an internal practice to integrate into existing systems and processes to deliver the sought insights. In a field so wide, relatively recent and infamous for its buzzwords-per-second count, formalising problems and making explainable decisions is the only route that won’t see you run out of resources and people’s patience.</p>

<p>This talk explores how we approached this challenge at mx51 armed with lessons from engineering and statistics. We start by defining the optimisation problem formally(-ish) and then applying it to actual decisions faced along the way, including technology selection, warehousing and data lake (both Snowflake), ETL, visualisation and ML-driven insights.</p>]]></content><author><name>Mike Gouline</name></author><category term="data" /><category term="leadership" /><category term="snowflake" /><category term="talk" /><summary type="html"><![CDATA[Many (if not most) companies reach a point when data becomes a priority. This implies building out an internal practice to integrate into existing systems and processes to deliver the sought insights. In a field so wide, relatively recent and infamous for its buzzwords-per-second count, formalising problems and making explainable decisions is the only route that won’t see you run out of resources and people’s patience.]]></summary></entry><entry><title type="html">Exporting dbt Schema to Metabase</title><link href="https://gouline.net/2020/03/12/exporting-dbt-schema-to-metabase.html" rel="alternate" type="text/html" title="Exporting dbt Schema to Metabase" /><published>2020-03-12T00:00:00+00:00</published><updated>2026-04-09T10:38:20+00:00</updated><id>https://gouline.net/2020/03/12/exporting-dbt-schema-to-metabase</id><content type="html" xml:base="https://gouline.net/2020/03/12/exporting-dbt-schema-to-metabase.html"><![CDATA[<p>Metabase, a brilliant open-source BI tool, allows you to define your data model on top of the database schema, which includes descriptions, special types and table relationships. However, updating everything manually is not repeatable and prone to errors, so I will demonstrate how to export your existing dbt schema into Metabase automatically with a tool I created.</p>]]></content><author><name>Mike Gouline</name></author><category term="data" /><category term="dbt" /><category term="metabase" /><category term="talk" /><summary type="html"><![CDATA[Metabase, a brilliant open-source BI tool, allows you to define your data model on top of the database schema, which includes descriptions, special types and table relationships. However, updating everything manually is not repeatable and prone to errors, so I will demonstrate how to export your existing dbt schema into Metabase automatically with a tool I created.]]></summary></entry><entry><title type="html">Return from the Dark Side</title><link href="https://gouline.net/2019/05/26/return-from-the-dark-side.html" rel="alternate" type="text/html" title="Return from the Dark Side" /><published>2019-05-26T00:00:00+00:00</published><updated>2026-04-09T10:38:20+00:00</updated><id>https://gouline.net/2019/05/26/return-from-the-dark-side</id><content type="html" xml:base="https://gouline.net/2019/05/26/return-from-the-dark-side.html"><![CDATA[<p>There comes a time in a software engineer’s career when they start asking the dreaded question. Do I continue writing code as an ‘individual contributor’ or should I start the gradual descent into management?</p>

<p>Here is my tale of exploring the ‘dark side’ and eventually coming back. Take it for what it is, pseudo-philosophical ramblings on an unoriginal topic, as compiled from several anonymised places of employment.</p>

<h2 id="motivations">Motivations</h2>

<p>What motivates these forays into management? There are good reasons, such as realising that you’re great at mentoring people and enabling them to do their best work. This article won’t cover those as plenty of LinkedIn listicles already do. Here are some bad reasons.</p>

<p>Some people in the industry seem to think that reaching a certain age implies that it’s time to close your IDE, open your email client and become a manager. The exact age varies but it’s a popular enough theory to warrant a mention.</p>

<p>Money is another one. In larger companies your pay is determined by which ‘band’ you belong to and these bands usually separate the managers from the non-managers. As a result, you get people who are in management only because their annual pay reviews hit the wall.</p>

<p>Then there’s the old ‘nobody else for the role’ scenario. Your manager got promoted up a level and somebody needs to fill his/her shoes. You’re the tech lead, you practically already manage the team, right? So who better for the job than you?</p>

<p>That last one is what happened to me. At the time I considered it a specific situation that only happened in our team, but after telling others about it, I quickly realised that it’s hardly rare. Regardless, that’s how I embarked on my journey from ‘tech lead’ to ‘team lead’ (if these terms sound the same to you, please look them up before reading any further).</p>

<h2 id="learnings-for-make-benefit-glorious-reader">Learnings for Make Benefit Glorious Reader</h2>

<p>I have no idea why I called it that. I don’t even like that <a href="http://www.imdb.com/title/tt0443453/">movie</a>. The point is, experiencing the ‘greenness’ of the grass on the management side leaves you with some lessons that you can carry further into whatever you end up doing next. Even a failed experiment yields data.</p>

<h3 id="meetings-are-mostly-pointless">Meetings are Mostly Pointless</h3>

<p>Communication is important, nobody is disputing that. If everyone is just writing code 100% of the time without aligning on what is being built and why, you will be extremely productive at achieving absolutely nothing. But there’s useful communication and there are meetings for the sole purpose of having a meeting and appearing more busy than you really are.</p>

<p>Unfortunately, managers are constantly subjected to meetings that produce less results than going out for coffee. ‘Power play’ meetings to show dominance, ‘get everybody in the room’ meetings to dilute blame if anything goes wrong, ‘lip service’ meetings to assure somebody important that a project is being worked on even though no resources are allocated to it, and many other types of meetings specific to each company.</p>

<p>How do you navigate these situations? No idea. Some people might get away with declining meetings that they don’t have to be in, others just use the time to get some work done on their laptops. The argument that sitting in meetings is not your job does not fare so well anymore now that writing code is no longer as high up on your job description.</p>

<p>If only companies with prevalent ‘meeting cultures’ installed conference room <a href="https://twitter.com/boredelonmusk/status/588750177084669952">counters</a> to measure the monetary cost of each meeting. Surely the dollar figures would help curb some of that behaviour.</p>

<p><img src="https://gouline.net/img/posts/NFcXFLuC1tuq9191MOFbhw.webp" alt="Hero image" />
<small>Photo by <a href="https://unsplash.com/photos/Se7vVKzYxTI">Drew Beamer</a> on <a href="https://unsplash.com/">Unsplash</a></small></p>

<h3 id="exposure">Exposure</h3>

<p>What you often don’t realise as a software engineer is how much you’re being shielded from. You may have some idea, perhaps you even think of your manager as a great ‘sh*t umbrella’, but you never truly appreciate what falls on the fibres of that umbrella until you are it.</p>

<p>It’s not just pointless meetings but any number of things: pressures from senior management to deliver faster, inter-departmental politics, attempts from people with no expertise in what your team does to dictate how they should be doing their job, take a pick. All of this is now your business. These things might annoy you, even piss you off, but when you return to the area of the office that you and your team inhabit, you have to be cool and collected as if nothing happened. Anything you do relay to them has to be filtered and carefully phrased, otherwise you might start a chain reaction of rumours, overreactions and panic that won’t end well.</p>

<p>This balance between being completely transparent and as secretive as a press secretary for a totalitarian regime is incredibly hard to master. There’s no one stable solution for it. It completely depends on the culture within your team and how impressionable specific individuals in it are.</p>

<p>If you filter too much, you risk being perceived as a <a href="https://en.wikipedia.org/wiki/Frank_Underwood_(House_of_Cards)">Frank Underwood</a>-esque ‘puppet master’ who uses inside information to their own advantage. Conversely, if you’re completely transparent and relay everything that’s happened in this morning’s planning meeting to everyone, your most junior team member will start losing sleep fearing that everyone will be fired over an impulsive outburst from your CEO that engineers aren’t delivering quickly enough. Go figure.</p>

<p>As much of an inexcusable cliché it is, with great power, and in this case knowledge, comes great responsibility. No matter how minor the increase in that knowledge, you can either help or hurt your team with it.</p>

<h3 id="satisfaction-not-guaranteed">Satisfaction Not Guaranteed</h3>

<p>A software engineer’s job is engineering software. That’s what your performance is measured by and where your job satisfaction comes from at the end of a hard day.</p>

<p>A manager’s job is managing these people by removing any barriers standing in their way, guiding them through an oft-complex maze of company politics, and taking on unimportant (often unpleasant) tasks that would distract them from achieving their goals. It requires you to be a selfless jack of all trades who only succeeds when his/her whole team succeeds and who takes all the blame if everything goes south.</p>

<p>That’s easy to say, harder to do and harder still to get satisfaction from, when only a short while ago your main objective for the day was making all of your integration tests pass. Suddenly, it’s five o’clock and all you’ve done is attended some meetings, wrote some emails and maybe reviewed some code, if you’re lucky. What a frustratingly unproductive day, says your unadjusted brain. It’s draining!</p>

<p>Like with the last two points, I don’t have a universal solution. What helped me was making mental notes of things that you do throughout the day that provide value to somebody: you answered a question that unblocked somebody from working on their task, you found a potential bug while reviewing somebody’s code, you contributed to some design discussion, anything like that. The gratification is not as instant as running code and seeing it work, but it’s something.</p>

<h2 id="no-life-sentence">No Life Sentence</h2>

<p>Regardless of whether you’re enjoying management or not, it should not be a life sentence. There’s absolutely nothing wrong with your LinkedIn status changing from ‘Manager’ or ‘Team Lead’ to ‘Senior Software Engineer’, unless you’re the sort of person who’s a little too invested in job titles.</p>

<p>While I can’t speak for every hiring manager out there, I personally see alternating between ‘doing’ and ‘managing’ in people’s resumes as a positive. It means they’re never too far away from management to understand their perspective and they still know what they’re talking about from the technical standpoint. There’s nothing worse than a person in power who makes technical decisions having been off the tools for decades.</p>

<p>As long as there’s opportunity, focus on doing what you’re good at and what you enjoy doing, not what you think your career path has cornered you into doing. It’s not a sign of defeat or a downgrade, it just means that you missed <em>doing</em> things that you were helping your team do.</p>

<p>That reminded me of a quote from <a href="https://medium.com/u/4fdbe354f19b?source=post_page---user_mention--98cbb12bae62---------------------------------------">Kris Howard</a>’s <a href="https://www.web-goddess.org/archive/19106">article</a> where she announced her departure from organising technical conferences:</p>

<blockquote>
  <p>After being around such inspirational folks tackling big problems… I suddenly realised that I missed <strong>being those people</strong>.</p>
</blockquote>

<p>That’s precisely what I did, I went back to being one of those people. It’s not that I’m completely ruling out the possibility of going into leadership again, but I’m enjoying the return to being an individual contributor for now.</p>

<h2 id="your-mileage-may-vary">Your Mileage May Vary</h2>

<p>Here comes the disclaimer. Everything in this article is based solely on my own experiences in specific companies. While I’m sure many readers will identify with the problems that I encountered, that doesn’t mean that they are unavoidable.</p>

<p>Many software companies, as opposed to regular companies with software departments, encourage managers to remain hands-on. I’ve personally met a CEO of a software company with around 1000 employees who still regularly writes code.</p>

<p>Similarly, the ‘meeting culture’ isn’t as bad everywhere. Startups and smaller companies are often good places to escape it. The reason being that smaller businesses rely on everyone pulling their hardest to survive, unlike, say, a major bank that has enough redundancy to afford such inefficiencies.</p>

<p>So don’t be discouraged. Just ensure that your move into management is for all the right reasons and do your research before committing to it.</p>

<hr />

<p><em>A piece of trivia for the afterword is that I started writing this article shortly after I resigned from my management job and only finished it over a year later. While it admittedly smoothed out and added perspective to some of the harsher points, none of the overall opinions have changed. Hence why I decided to publish it after all this time and not relegate it to the eternal drafts folder.</em></p>]]></content><author><name>Mike Gouline</name></author><category term="leadership" /><summary type="html"><![CDATA[There comes a time in a software engineer’s career when they start asking the dreaded question. Do I continue writing code as an ‘individual contributor’ or should I start the gradual descent into management?]]></summary><media:thumbnail xmlns:media="http://search.yahoo.com/mrss/" url="https://gouline.net/img/posts/NFcXFLuC1tuq9191MOFbhw.webp" /><media:content medium="image" url="https://gouline.net/img/posts/NFcXFLuC1tuq9191MOFbhw.webp" xmlns:media="http://search.yahoo.com/mrss/" /></entry><entry><title type="html">Data Science and Other Buzzwords</title><link href="https://gouline.net/2018/08/12/data-science-and-other-buzzwords.html" rel="alternate" type="text/html" title="Data Science and Other Buzzwords" /><published>2018-08-12T00:00:00+00:00</published><updated>2026-04-09T10:38:20+00:00</updated><id>https://gouline.net/2018/08/12/data-science-and-other-buzzwords</id><content type="html" xml:base="https://gouline.net/2018/08/12/data-science-and-other-buzzwords.html"><![CDATA[<p>Kotlin continues to conquer new areas of software development, but some are still firmly held by one or two languages. Data science, statistical analysis and machine learning are largely Python domains, but with many performance-focused implementations based on the JVM, Kotlin has a good chance to break into this scene too. The intention of this talk is to give a shallow overview of what you can do today.</p>]]></content><author><name>Mike Gouline</name></author><category term="data" /><category term="kotlin" /><category term="talk" /><summary type="html"><![CDATA[Kotlin continues to conquer new areas of software development, but some are still firmly held by one or two languages. Data science, statistical analysis and machine learning are largely Python domains, but with many performance-focused implementations based on the JVM, Kotlin has a good chance to break into this scene too. The intention of this talk is to give a shallow overview of what you can do today.]]></summary></entry><entry><title type="html">KotlinConf 2017 Recap</title><link href="https://gouline.net/2017/11/29/kotlinconf-2017-recap.html" rel="alternate" type="text/html" title="KotlinConf 2017 Recap" /><published>2017-11-29T00:00:00+00:00</published><updated>2026-04-09T10:38:20+00:00</updated><id>https://gouline.net/2017/11/29/kotlinconf-2017-recap</id><content type="html" xml:base="https://gouline.net/2017/11/29/kotlinconf-2017-recap.html"><![CDATA[<p>Summary of the better talks, the more interesting themes, some conversations with other Kotliners and overall impressions about the first ever Kotlin conference in San Francisco. Think of it as your guide to what recorded talks to watch first.</p>]]></content><author><name>Mike Gouline</name></author><category term="kotlin" /><category term="conference" /><category term="talk" /><summary type="html"><![CDATA[Summary of the better talks, the more interesting themes, some conversations with other Kotliners and overall impressions about the first ever Kotlin conference in San Francisco. Think of it as your guide to what recorded talks to watch first.]]></summary></entry><entry><title type="html">You Can, but Should You?</title><link href="https://gouline.net/2017/11/02/you-can-but-should-you.html" rel="alternate" type="text/html" title="You Can, but Should You?" /><published>2017-11-02T00:00:00+00:00</published><updated>2026-04-09T10:38:20+00:00</updated><id>https://gouline.net/2017/11/02/you-can-but-should-you</id><content type="html" xml:base="https://gouline.net/2017/11/02/you-can-but-should-you.html"><![CDATA[<p>Kotlin provides a mountain of features that Java developers previously never had access to. This creates endless opportunities. This also creates confusion akin to that of a kid in a candy store, which is exacerbated by the transition from simple beginner demos to production code, expected to be readable, performant and maintainable. Which to choose? Should I be doing this?</p>]]></content><author><name>Mike Gouline</name></author><category term="kotlin" /><category term="talk" /><summary type="html"><![CDATA[Kotlin provides a mountain of features that Java developers previously never had access to. This creates endless opportunities. This also creates confusion akin to that of a kid in a candy store, which is exacerbated by the transition from simple beginner demos to production code, expected to be readable, performant and maintainable. Which to choose? Should I be doing this?]]></summary></entry></feed>